francais
  •   HOME   
  • PRODUCTS
    • Irrigation
    • Drip Irrigation
    • Mist Cooling
    • LED Landscape Lights
  • PLAN & DESIGN
  •     CONTACT US   
  • FRANCAIS
Image 02 english
Image 03 english
Image 05 english
Image 02 english
 Free fast shipping on orders over $175*
Special offers
Up to 65% off
Products
Irrigation
Controllers DIY Kits Electrical Plumbing Rain Sensors Spray Pistols and Accessories Sprinklers Tools Valve Boxes Valves Brands Clearance
Drip Irrigation
1/2" Micro Fittings and Adapters 1/4" - 1/2" Tubing & Rigid Risers 1/4" Micro Fittings and Adapters Ball Valves Drip Drip Irrigation Kits Drip Irrigation Valves Dripline Filters Gardena Green Wall Hose Faucet Fittings Hose Faucet Timers Manifolds Micro Irrigation Kits Micro Irrigation Tools Micro-Drip Clamps Mini Sprays Mini Sprinklers Mini-Jets Pressure Regulator Stakes Section - Agriculture Cannabis DIG Products
Mist Cooling
Mist Cooling Systems Mist Cooling Accessories
LED Landscape Lights
Controller Lighting Landscape Lighting Wire Motion Sensor LED Landscape Lighting Kits Rain Bird Sprinkler System Design - Customer Shopping List

Store > Drip Irrigation > Green Wall

Items 1 to 4 of 4

Living Wall™ Vertical Garden

Kit with 8 Pots (4 small, 4 large)
SKU : W-GLW08

Quantity
x

Living Wall™ Pots

Small Pots - Each
SKU : W-70009S

Quantity
x

Living Wall™ Pots

Large Pots - Each
SKU : W-70010L

Quantity
x

Modular Mounting Bracket

Wall Mounting Brackets - Black
SKU : W-70007

Quantity
x
Items 1 to 4 of 4


Back to department : Drip Irrigation


ABOUT US
Irrigation DepotTM, the main specialist in the field of residential, commercial and green open spaces irrigation in Canada.
TECHNICAL INFORMATIONS
Guides & Tutorials
STORE POLICIES
Shipping, Delivery, Returns
• We do not ship to PO boxes
CONTACT US
It will be our pleasure to answer your questions and to help by using our team's expertise.
© 2006-2025 Irrigation Depot inc. All rights reserved. The use of this site is subject to certain conditions of use.

Living Wall™ Vertical Garden

Kit with 8 Pots (4 small, 4 large)
SKU : W-GLW08

  • Product Overview
  • Specifications
  • Kit Contents
  • Installation
  • How to Use

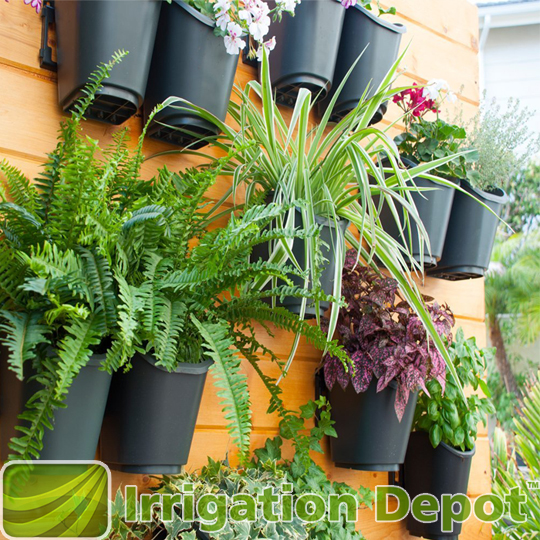
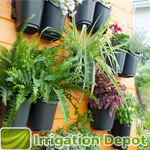
Living Wall™ vertical garden is a modular set of specialized containers and accompanying accessories that allows the user to create a vertical green wall. DIG’s Living Wall™ vertical garden can be affixed to any wall structure to transform the space into a green, growing environment. This modular garden can be fitted to any sized structure by attaching wall mounting brackets that can be secured to each other. DIG’s new Living Wall™ is designed to make a vertical garden easy to set up, expand and maintain on balconies, patios, indoor or outdoor walls, and fences.

Living Wall™ vertical garden enables you to grow a diversity of plants including herb or vegetable gardens, annuals, perennials, a collection of plants with striking patterns and colors as a welcoming

DIG’s Living Wall™ Modular Vertical Garden kit is designed with expandable wall mounting brackets from which up to four large and four small pots can be hung vertically. The kit also includes an integrated professional watering system to deliver controlled amounts of water into each individual pot, using pressure compensating drippers with check valves.

DIG’s Living Wall™ Modular Vertical Garden Kit supports an open area between the pots and the wall, providing protection from moisture and preventing discoloration of the exposed wall.

Features

  • Convenient modular wall mounting brackets that allow the pots to be hung and removed from the wall very easily.
  • The wall mounting modular brackets can be easily secured to each other with a simple self-lock position for quick and easy installation and kit expansion.
  • The durable modular wall mounting brackets can be connected in a wide range of patterns with vertical or horizontal panels or any pattern desired.
  • The kits pots can easily be mounted, removed, repent and re-mounted again for very convenient system installation
  • The water supply is all out of sight except for the very small micro tubing that delivers water to a pressure compensating dripper positioned at each pot.
  • The water line from Living Wall™ vertical garden kit can be connected into the water supply household faucet or garden hose.
  • All connections are drip irrigation standard and additional parts are available at local hardware stores or garden centers.
  • Uses DIG’s pressure compensating drippers with built-in check valves that eliminate water draining when the system is shut off, saving additional water.
  • Quick and easy to install and maintain.

Product specifications

  • Small pot size: 4.7" (12 cm) width x 5.1/2” (14 cm) depth x 6 1/2” (16 cm) height
  • Large pot size: 7” (17 cm) width x 6 7/8” (17 cm) depth x 6 1/2” (16 cm) height
  • Pot color: grey
  • Pot weights:
    • Small pot: .367 lbs. (.166 kg)
    • Large pot: .592 lbs. (.269 kg)
  • Modular wall mounting bracket: 7” (17.8 cm) Width x .7” (1.7 cm) Depth x 4.5” (11 cm) Height
  • Wall mounting bracket color: black
  • Screw size: # 8 x ¾” length
  • Wall mounting bracket weight: .121 lbs. (0.055 kg)
  • Drip irrigation operating pressure: 10-50 PSI (.7 to 3.4 bar)
  • Number of drippers: 8
  • Required opening pressure: 4.3 PSI (.3 bar)
  • Closing pressure: 2.2 PSI (.15 bar)
  • Flow rates and color codes:
    • .3 GPH (1.1 L/H) color code brown inlet x gray outlet
  • Dripper inlet size: ¼” barb
  • Dripper outlet side: 1/8” (3 mm) barb
  • The irrigation kit is expandable up to 65 pots using ¼” (6 mm) micro tubing as the main line. If larger the main line shall need to be ½” (16 r 17 mm).

DIG’s new living wall™ modular vertical garden planting kit features a new concept in gardening allowing the quick positioning, mounting, and expansion of planted pots vertically. The kit utilizes framed mounting brackets, which may be attached to any interior or exterior structure to transform a space into a green, growing environment.

Living Wall Kit Contents

Kit includes:

  • 4 Small pots
  • 4 Large pots
  • 8 Modular wall mounting bracket with screws
  • 1 25 PSI  preset pressure regulator
  • 1 3/4" x 1/4"  adapter
  • 1 Screen filter washer
  • 1 Punch
  • 10 1/4"  tees
  • 2 1/4" barbs
  • 4 1/4" barbed elbows
  • 8 .3 gph PC -CV drippers
  • 8 2' lengths of 1/8" micro tube
  • 8 stakes

Living Wall Installation

Living Wall Shema Installation

Location is important in growing a Living Wall™ vertical garden. Growing on a vertical surface means that the amount of full sunlight may be restricted. Review the location and planting type that should be planted in the selected location. Also, think about where your water source will be and how easily you can connect to the water supply line.

Determine what pattern you want to create and mount the wall mounting brackets accordingly. Due to the wall mounting bracket modular design, for best results and easy installation, start from left side and keep a space of between 12" to 18" (30 to 45 cm) between each level.

Once you have determined where your first wall mounting bracket is to be located, hold it against the wall and get it level. It is most important that you get it level if you are going to add more brackets, because a small level error may magnify as the line of wall mounting brackets grows longer. We recommend using a minimum of two screws per each mounting bracket and to utilize the two holes at the top, on the left and right of the DIG logo (see illustration). Each mounting bracket has eight holes but no more than two to four screws are needed. Use a screwdriver to mount the first bracket to the wall or structure using the screws provided.

If attaching to a solid wall made of brick or concrete, use a masonry bit to drill the holes.

Once a single wall mounting bracket is mounted, place an additional bracket and secure it to the first one; then continue mounting all other mounting brackets using the same method.
Living Wall™ Pots

Small Pots - Each
SKU : W-70009S

  • Product Overview
  • Specifications
  • How To Use

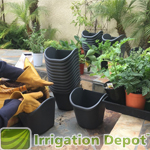
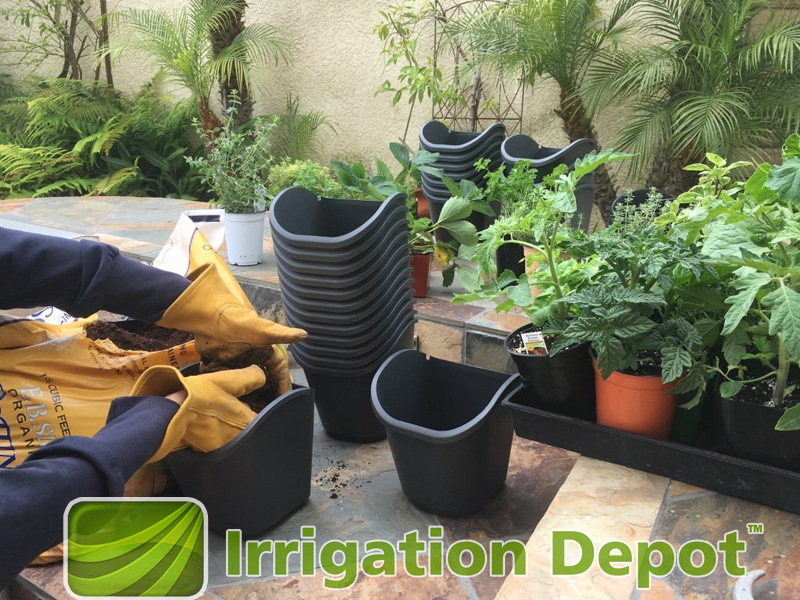
DIG's planter's two sized pots are used in the installation of DIG's Living Wall Modular Vertical Garden. They are designed to be potted at the bench, at a good working height and then mounted into the modular wall mounting brackets as part of your vertical garden.

Features

  • The Living Wall™ vertical garden planter's pots can be removed from the panel. This means that the potting is done at the bench at a good working height. The plants can even be established on the ground before positioning and mounting onto the modular wall mounting brackets.
  • The planter's pots are designed with meshed screen plate with two internal supporting legs faced downward that provide root protection, providing a safe growing medium.
  • The Living Wall™ vertical garden is a low maintenance system that has open layers between the pots and the wall, providing protection from moisture and preventing discoloration of the exposed wall.
  • Offers the ability to add, remove, re-plant, and re-hang the pots quickly and easily
  • Potting can be completed at a bench at a good working height before mounting
  • Once the pots have been mounted to the panels, if something goes wrong, it's easy to remove a single pot and fix the problem and even replant and then pop it back into its original position.
  • The pots are made with a raised drain hole at the bottom for better water holding capability that may allow for less frequent

Specifications

  • Small pot size: 4.7" (12 cm) width x 5.1/2" (14 cm) depth x 6 1/2" (16 cm) height
  • Large pot size: 7" (17 cm) width x 6 7/8" (17 cm) depth x 6 1/2" (16 cm) height
  • Pot color: grey
  • Pot weights:
    • Small pot: .367 lbs. (.166 kg)
    • Large pot: .592 lbs. (.269 kg)

Pots Planting and mounting

Plant the pots before mounting them into the wall mounting brackets. One of the main features of DIG's Living Wall™ vertical garden is that the pots can be removed from the mounting brackets. This means that the potting can be completed at a bench at a good working height. The plants can even be established on the ground before mounting onto wall mounting brackets. Once the pots have been mounted to the panels, if something goes wrong, it's easy to remove a single pot and solve the problem and even replant and then pop it back into its original position.

  1. Position the meshed screen plate inside the pot with the two supporting legs faced down.
  2. Plant the pot using the correct selecting the right potting mix for the plants used.
  3. Mount the pots onto the wall mounting brackets. Each pot has a flat hook at the rear that slides into the center slot on the mounting brackets. The slot is wider than the flat hook and this allows some movement when positioning the pots.
  4. Once the pot is mounted and in position, insert the micro stake into the pot and position the micro stake near the center of the pot. Anchor the micro stake, which can be pushed into the potting mix, so it doesn't get blown or sprung out of position.
  5. If you are growing a selection of plants, please be aware that the top row is best for taller growing plants as their natural vertical habit of growth is upward. For the second row of panels with pots it's better to choose plants with a flat or even trailing growth habit so these can get access to sunlight.
  6. Once all the pots are in place and the drip system is connected, turn the water on and check if the system is working well. If it is leaking somewhere, investigate the issue and fix it. Pressure-test the system to identify leaks in the laterals and fittings, and then program the hose end timer if used.
  7. Water the plants as regularly as required. As a rule, the surface of the soil should dry out between each watering. Watering requirements will vary as determined by location, weather, plant and soil type. Use a hose end timer to regulate how much water is applied to the plants.
  8. It is a simple to add extra pots. Once you have the mounting brackets pots installed use the same method to add additional wall mounting brackets and pots. Use the same method to expand the irrigation system.

Living Wall™ Pots

Large Pots - Each
SKU : W-70010L

  • Product Overview
  • Specifications
  • How To Use

DIG's planter's two sized pots are used in the installation of DIG's Living Wall Modular Vertical Garden. They are designed to be potted at the bench, at a good working height and then mounted into the modular wall mounting brackets as part of your vertical garden.

Features

  • The Living Wall™ vertical garden planter's pots can be removed from the panel. This means that the potting is done at the bench at a good working height. The plants can even be established on the ground before positioning and mounting onto the modular wall mounting brackets.
  • The planter's pots are designed with meshed screen plate with two internal supporting legs faced downward that provide root protection, providing a safe growing medium.
  • The Living Wall™ vertical garden is a low maintenance system that has open layers between the pots and the wall, providing protection from moisture and preventing discoloration of the exposed wall.
  • Offers the ability to add, remove, re-plant, and re-hang the pots quickly and easily
  • Potting can be completed at a bench at a good working height before mounting
  • Once the pots have been mounted to the panels, if something goes wrong, it's easy to remove a single pot and fix the problem and even replant and then pop it back into its original position.
  • The pots are made with a raised drain hole at the bottom for better water holding capability that may allow for less frequent

Specifications

  • Small pot size: 4.7" (12 cm) width x 5.1/2" (14 cm) depth x 6 1/2" (16 cm) height
  • Large pot size: 7" (17 cm) width x 6 7/8" (17 cm) depth x 6 1/2" (16 cm) height
  • Pot color: grey
  • Pot weights:
    • Small pot: .367 lbs. (.166 kg)
    • Large pot: .592 lbs. (.269 kg)

Pots Planting and mounting

Plant the pots before mounting them into the wall mounting brackets. One of the main features of DIG's Living Wall™ vertical garden is that the pots can be removed from the mounting brackets. This means that the potting can be completed at a bench at a good working height. The plants can even be established on the ground before mounting onto wall mounting brackets. Once the pots have been mounted to the panels, if something goes wrong, it's easy to remove a single pot and solve the problem and even replant and then pop it back into its original position.
  1. Position the meshed screen plate inside the pot with the two supporting legs faced down.
  2. Plant the pot using the correct selecting the right potting mix for the plants used.
  3. Mount the pots onto the wall mounting brackets. Each pot has a flat hook at the rear that slides into the center slot on the mounting brackets. The slot is wider than the flat hook and this allows some movement when positioning the pots.
  4. Once the pot is mounted and in position, insert the micro stake into the pot and position the micro stake near the center of the pot. Anchor the micro stake, which can be pushed into the potting mix, so it doesn't get blown or sprung out of position.
  5. If you are growing a selection of plants, please be aware that the top row is best for taller growing plants as their natural vertical habit of growth is upward. For the second row of panels with pots it's better to choose plants with a flat or even trailing growth habit so these can get access to sunlight.
  6. Once all the pots are in place and the drip system is connected, turn the water on and check if the system is working well. If it is leaking somewhere, investigate the issue and fix it. Pressure-test the system to identify leaks in the laterals and fittings, and then program the hose end timer if used.
  7. Water the plants as regularly as required. As a rule, the surface of the soil should dry out between each watering. Watering requirements will vary as determined by location, weather, plant and soil type. Use a hose end timer to regulate how much water is applied to the plants.
  8. It is a simple to add extra pots. Once you have the mounting brackets pots installed use the same method to add additional wall mounting brackets and pots. Use the same method to expand the irrigation system.

Modular Mounting Bracket

Wall Mounting Brackets - Black
SKU : W-70007

  • Product Overview
  • Specifications

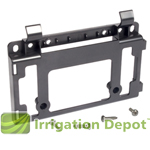
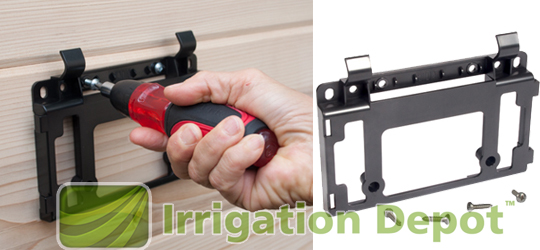
Dig's Modular Vertical Garden Wall Mounting Brackets are designed to attach to any structure and are easily expanded by attaching additional mounting brackets that are secured to each other utilizing a unique self-lock system.

Features

  • A convenient, durable wall mounting bracket allows the pots to be easily hung and removed from the wall
  • Unique design with simple self-lock position of the mounting bracket allows for quick and easy system installation and expansion
  • Determine what pattern you want to create and mount the wall mounting brackets accordingly.
  • The low maintenance wall mounting bracket provides an open area between the pots and the wall, supporting protection from moisture and preventing discoloration of the exposed wall.
  • The durable modular mounting brackets can be connected in a wide range of patterns with vertical or horizontal layout for any pattern desired

Specifications

  • Modular wall mounting bracket: 7" (17.8 cm) Width x .7" (1.7 cm) Depth x 4.5" (11 cm) Height
  • Wall mounting bracket color: black
  • Screw size: # 8 x 3/4" length x 4
  • Wall mounting bracket weight: .121 lbs. (0.055 kg)
  • Mounting start from the left side
  • Spacing: between 12" to 18" (30 to 45 cm) of each level.